像素那无与伦比的魔力,有一种充满华丽的美感!
被风吹过的像素?你会发现不一样的美,仿佛看的到时间在眼前流逝。
用风滤镜打造的神奇像素世界,你 值得拥有!
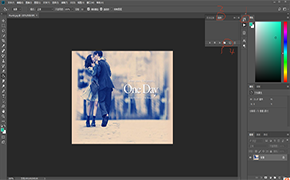
吹的这么玄乎,还是先看一看几张来自国外大神Jessica Andersdotter的作品。
[img=1000,1333]http://p3.pstatp.com/large/5e7500059d1e25806413[/img]
[img=1000,1333]http://p3.pstatp.com/large/5e780000003f9175f94d[/img]
嗯,这两个就是他的作品。
所以今天分享这篇教程供大家参考,花了半天的折腾,一起来试试吧。
先找一张风光图片,复制一层。以防万一。
[img=587,590]http://p3.pstatp.com/large/5e780000003d763ce4cd[/img]
执行“滤镜>风格化>风”。
[img=618,701]http://p9.pstatp.com/large/5e72000631c26ce8cc18[/img]
风的选择看你自己的爱好了,很可惜没有龙卷风。方向我选择的是从右。
[img=592,592]http://p1.pstatp.com/large/5e7500059d19f37be6ac[/img]
执行了一次风滤镜以后差不多是这样的。
[img=770,571]http://p3.pstatp.com/large/5e7500059d1cb78af769[/img]
额,变化并不是很明显,so!让暴风来的更猛烈吧,当然还是要把握好次数,看了舒服就好。执行了十几次后,效果如下。
[img=664,589]http://p3.pstatp.com/large/5e740006086aa415d056[/img]
颜色比较平淡,如果觉得层次感很弱的话,可以加个曲线和增强对比度,这样视觉冲击会更强烈。
[img=665,589]http://p1.pstatp.com/large/5e760003c023d36aed18[/img]
你还可以换个颜色,按自己喜好来。
[img=589,588]http://p3.pstatp.com/large/5e7800000039de495d55[/img]
然后选取合适的部分进行裁剪
[img=607,398]http://p1.pstatp.com/large/5e780000003a422cd6d1[/img]
接下来你还可以旋转,只要你有想象力。
[img=635,1000]http://p3.pstatp.com/large/5e770004a3addccfac80[/img]
[img=635,1000]http://p3.pstatp.com/large/5e760003c0247a3fe29f[/img]
[img=635,1000]http://p3.pstatp.com/large/5e74000608693dfb8f8e[/img]
教程很简单,但是,还没完,这是一张Martina Stipan的合成作品。
[img=639,360]http://p1.pstatp.com/large/5e780000003c37742ab3[/img]
在我进行N次风滤镜后,它是这个样子的。
[img=780,437]http://p1.pstatp.com/large/5e7500059d1b2cf78424[/img]
接下来我要制作一个极坐标,框选一个正方形。
[img=770,528]http://p1.pstatp.com/large/5e790003c426dd91fb87[/img]
复制,并粘贴到一个新建文档中。
[img=771,569]http://p1.pstatp.com/large/5e760003c062d38d4a8c[/img]
执行极坐标—滤镜。
[img=770,672]http://p3.pstatp.com/large/5e72000632c4c6a60f62[/img]
[img=766,574]http://p1.pstatp.com/large/5e790003c57918f7ddf2[/img]
复制一次图层,旋转角度。
[img=769,603]http://p3.pstatp.com/large/5e770004a57e63f9f528[/img]
接下来添加蒙版,更好的让两个图层过渡。
[img=768,598]http://p3.pstatp.com/large/5e760003c284f67a24f5[/img]
放大一倍后,cool!
[img=770,523]http://p3.pstatp.com/large/5e770004a6b1ecbb4a31[/img]
[img=770,523]http://p3.pstatp.com/large/5e78000003b3cfa790ec[/img]
[img=770,523]http://p3.pstatp.com/large/5e760003cf19fd4cda6c[/img]
那么,是不是该结束了?NO!继续。如果在风后面,我们再添加别的效果?
[img=770,481]http://p3.pstatp.com/large/5e760003cf9c69f0eb4a[/img]
跟刚才的方法一样,执行了风滤镜,曲线增强对比度后,我得到这样的效果。
[img=769,526]http://p3.pstatp.com/large/5e770004b3c88fd824fc[/img]
OK,到了随意发挥的时候了,我盖印了图层,执行了一个凸出。
[img=769,589]http://p9.pstatp.com/large/5e790003d55a65e24ed2[/img]
放大一倍后,效果如下,你觉得怎么样?
[img=769,489]http://p1.pstatp.com/large/5e760003d1a5daf53e59[/img]
[img=769,489]http://p3.pstatp.com/large/5e7400061a40c6fd895a[/img]
我又换了个颜色
[img=770,556]http://p3.pstatp.com/large/5e760003d28fc14c92af[/img]
这张图我把凸出滤镜去掉了,换成了一个拼缀图滤镜,变这样了。
[img=769,652]http://p3.pstatp.com/large/5e780000130d968cd264[/img]
[img=770,553]http://p9.pstatp.com/large/5e7400061b6bb64e5949[/img]
再增强下图像的对比度,满满的科技感。
[img=769,554]http://p3.pstatp.com/large/5e750005b0d4cd4eaa8c[/img]
嗯,继续,这是一张有些酷酷的图。
[img=770,433]http://p3.pstatp.com/large/5e790003d8b9fae5a9d0[/img]
执行完风,似乎更酷了...
[img=780,439]http://p1.pstatp.com/large/5e760003d4e26ea85341[/img]
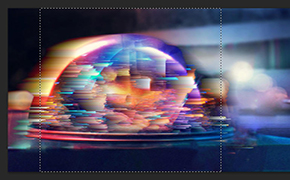
我又执行了一个径向模糊滤镜。
[img=770,524]http://p3.pstatp.com/large/5e780000156267b61741[/img]
它就成这样了,感觉像在穿越星空啊。
[img=640,360]http://p1.pstatp.com/large/5e76000405c5fe628fa3[/img]
接下来就是开始玩耍的时候了。
[img=1535,799]http://p3.pstatp.com/large/5e770004bd20208ad017[/img]
[img=1535,799]http://p3.pstatp.com/large/5e760003da04ebb58374[/img]
[img=1535,799]http://p3.pstatp.com/large/5e760003da031b84527d[/img]
[img=1535,799]http://p3.pstatp.com/large/5e790003ddfea1a2fc44[/img]
好了,现在真的结束了,如果你看到了这里,你会有所收获的。我会将我所用到的图片分享给大家,同时分享几张大尺寸的,层次感强一点的图给大家。
当然,这个方法不是万能的,不同的图片做出来的的效果差别很大,大家自己试可以一下。星空、天空、石头之类的图片,效果会更好一些。


![[致奋斗的你]TANGPION](https://img.zhisheji.com/Fk_B53cYb4RjlpM-_tz02-mCHuNB?imageMogr2/quality/100/sharpen/1/thumbnail/290x/crop/!290x180)


 粤公网安备 44030902001796号 粤ICP备19041343号-3


全部评论()